09. Docker – Implementation => How to containerize a project | Dockerfile.
Containerize කිරීමේදී
මුලින්ම image එකක් සදා ගත යුතු අතර එයින් අවශ්ය පරිදි container
instances සදා ගනු ලබයි.
Image එකක් යනු application
එකේ සියලුම
දේවල් අඩංගු කරලා තියන template එකකි.මෙම template එකෙන් හදන instances තමා containers කියන්නේ.
Basically වම containers යනු image වල runtime
instances ලෙසද කිව
හැකිය.
Application එකක්
containerize කල හැකි ආකාර
2කි.
01.Application එක develop කරලා containerize
කරනවා.
02.Container එකක් ඇතුලෙම application
එක develop කරනවා.
මෙහිදී පළමු
ආකාරය පමණක් විස්තර කරනු ලබයි.
01.Application
එක develop කරලා containerize
කරනවා.
සාමාන්ය ලෙස
ඕනෙම technology එකක් use කරලා මුලින් application
එක develop කරනු ලබන අතර පසුව Dockerfile නම් configuration
file එකක් හරහා application
එක docker
image එකක් බවට convert කරගනු ලබයි.ඉන්පසු docker වලදී එම image එකෙන් ඕන තරම් containers හදාගත හැක.
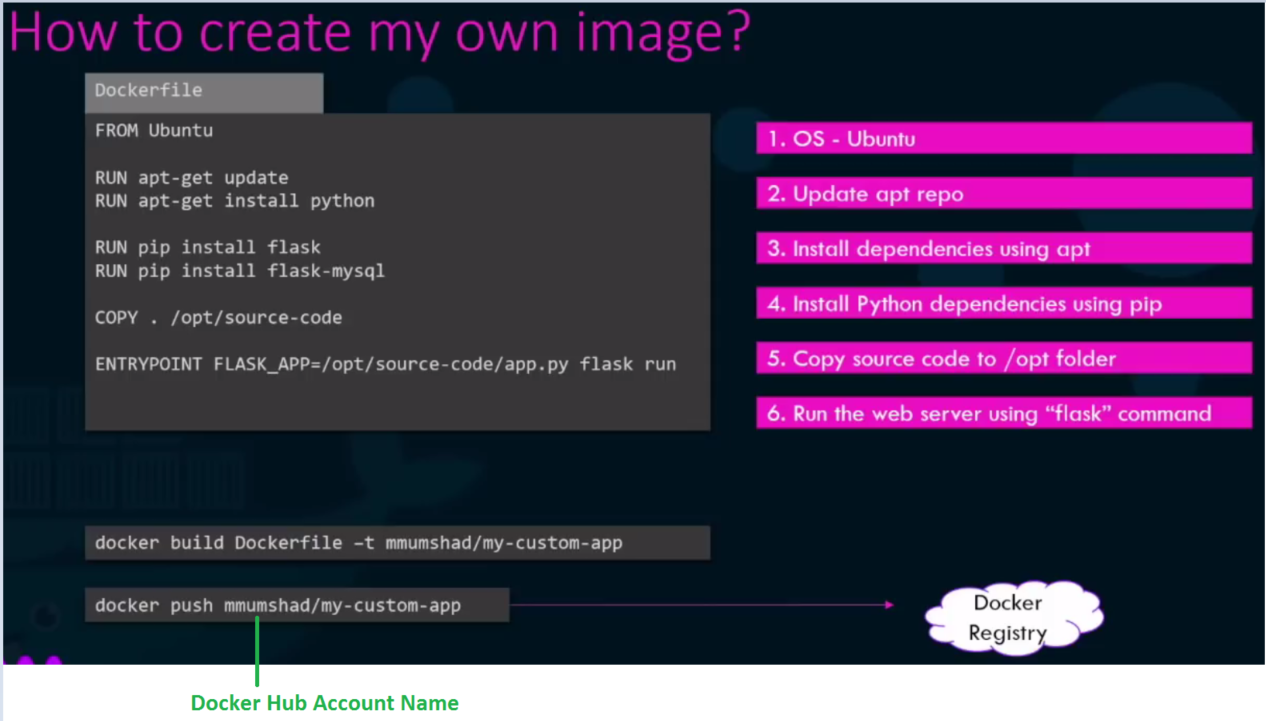
Dockerfile
Dockerfile is a text file which include all the instructions to build
the docker image. File name can be anything, but most probably take the file
name as “Dockerfile”.It is the default file name. If it is changed, that
name should be given in image building command.
Docker build command එක දුන්නම layer විදිහටඋඩ සිට පහලට run
වේ.එක layer එකක් හෝ fail වුනොත් image එක rebuild කරන්න සිදු වේ.
If docker file name is Dockerfile,
docker build -f Dockerfile -t
give_a_name_to_image
But, Because it is the default file name,
docker build . -t give_a_name_to_image
Otherwise
docker build -f abc -t docker_springboot_h2 .
මෙම image එකෙන් continers හදාගන්න විදිහ next post එකේදී විස්තර කර ඇත.
To take more details about Dockerfile :
https://docs.docker.com/develop/develop-images/dockerfile_best-practices/
Dockerfile Example
FROM openjdk:11
ARG JAR_FILE=target/docker_SB_3.jar
COPY ${JAR_FILE} app.jar
EXPOSE 8083
ENTRYPOINT ["java","-jar","/app.jar"]
FROM - The FROM
instruction initializes a new build stage and sets the Base Image for
subsequent instructions. As such, a valid Dockerfile must start with
a FROM instruction
ADD – copping the file
from host to the container. It take 2 arguments. Those are source and
destination.
ENV – This is used to set
environment variable (one or more).These venerable consists of key value pair
which can be accessed within the container.
WORKDIR – this is used to
set where the command defined with CMD is to be executed.
EXPOSE -This application
is active on this port number inside the container. Only specific to the
container. This is only used inside the container. If you want to access in
from the host machine you have to do port mapping (-p 8080:8080)
MANAGER – this
non-executing command declares the author, hence setting the author field of
the images. It should come nonetheless after FROM.
USER – is used to set
username which is to run the container based on the image being built.(USER
1125)
VOLUME – This is used to
enable access from your container to a directory on the host
machine.(VOLUME[/lahinu/myfile]).All the file related to the container is
stored here. Same path can be shared with multiple containers.


Comments
Post a Comment